Dec 31, 2012

I'm ready for 2013: Word of the year


2012, where did the year go? This year has been filled with so many good surprises...I moved my business into an even more competitive market including clients from Dolce and Gabbana, I traveled for brides and clients alike to here..there...and everywhere, photoshoots landed me in some of the top 100 blogs in the wedding industry, I turned 30 and I saw the world as a little more fabulous, I painted everything I could find gold, I watched my sister marry her husband, fell even more madly in love with my beau and doggie Oliver, and began the process of rebranding. While I'd like to reflect on all of the good things I can't help but remember the heartbreaks of 2012.  This year I lost my dearest Nell (grandmother) and the pain of that loss was so great that I didn't think I could find the strength to continue running this business, I buried my head in the sand when it came to blogging and twitter, and more than anything I just felt lost and overwhelmed. The reality is I was busy, sometimes too busy to slow down and far too busy to quiet my mind, running MME and working a full time job was exhausting and at different points during the year it felt almost impossible.

So In 2013 I've decided to choose one word for the year, a reminder if you will of something that I need to do. My word for 2013 is Cherish.  I chose this word because loosing Nell reminded me of how much I need to cherish the people that are in my life, I need to get closer to God and answer the calling I've felt toward my faith, I need to cherish the opportunities that I've been so divinely blessed with, and lastly I need to cherish me more this year....

2013 is going to be a year of change for me, my life, my beau, my oliver, and MME, there are a lot of unclear roads and paths that I'm going to be traveling but I'm ready and I hope you'll stay with me. Here's to closing my eyes-taking the next step-and cherishing all of the momentous occasions to come in 2013!

Now for a recap of pictures that make me giddy!


Dec 16, 2012

WINNER--ANNOUNCED

Thanks to all that participated, now to announce the winner (drum roll please!)...........

I put all the numbers in a hat and LUCKY COMMENT #6 (B Jaime Hall) will receive this lovely book in the mail just in time for the holidays along 2 dessert plates (of their choice) from my collection.

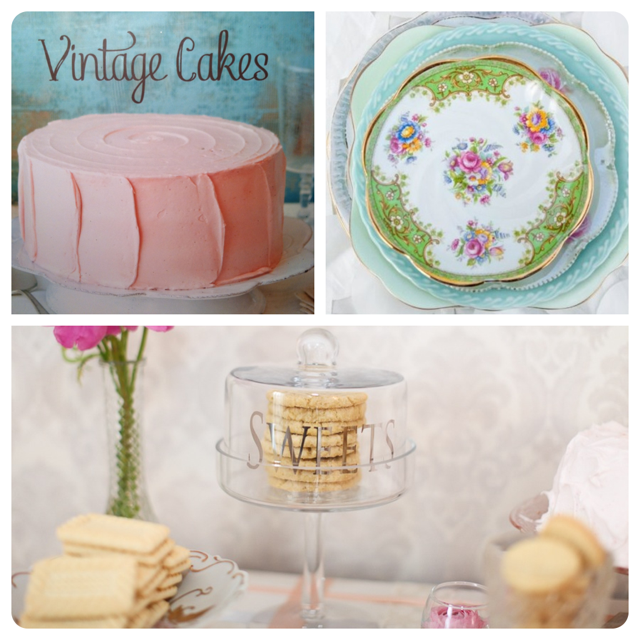
Here's a sneak-peek into this deliciously fabulous book.

One of my favorite recipes


Love these vintage cake and pie knives


Dec 11, 2012

MY 5 step recipe to success

A few days ago I was thumbing through an old magazine and stumbled upon a sentence that really hit home for me. Work it-Own it-Love it, simple right? Now that I've had a few years to reflect on Making Me and the growth that I've seen my little baby take on it's great for me to go back to the beginning from time to time and remember that I didn't always follow my now wiser advice. You are your business, find what you love and work the shit out of it. I mean seriously the wedding industry is difficult to break into but finding your own identity is key. I decided a long time ago not to do things the way anyone else was because I was "supposed to" but because it made sense for me and my business. If you've recently started your own business (lean in close I have advice for you) or if you're re-evaluating the direction of your business here's my advice.

1.) Be fearless, start something fail at it and get the hell over it. Trust me in business you are going to fail at something, I can't tell you how many times I said to myself damn...I'm totally failing at twitter! Once you've hit the bottom you'll know exactly what you did to get there and you'll never do it again.

2.) Be yourself! You don't want to look at your business one day thinking who am I and how did I make a business off of copying others? There is nothing more disheartening as a business owner to look  around and feel like you've had your business high jacked by someone who didn't have the gumption to work their way to the top.

3.) Enjoy being the new kid on the block. Seriously best feeling ever!

4.) Ok you've made it, stay grounded. I own and operate Making Me and it's been pretty successful but you'll never catch me acting like a diva.

5.) Reward yourself! Running a business is hard work every now and then stop and smell the roses, eat a cupcake (off a pretty plate if you can-wink), take a trip, and celebrate the hell out of the success you've been able to accomplish you deserve it!

Here's to a very happy and successful business!

Dec 10, 2012

Holiday Present giveaway!

Oh my do I have a great gift for you! I'm so excited to announce a sweet surprise just in time for the holidays.  I'm giving away one of my favorite books, Vintage Cakes by the oh so talented Julie Richardson and gifting you 2 vintage plates dessert plates from my collection. Oh and did I forget to mention that you will get to select the dessert plates you'd like?! Hand selected by you and gift wrapped by me all in time to bring you holiday cheer!

To enter:

1.) Make sure you have liked Making Me Event Planning Firm facebook page
2.) Follow this blog by signing up and joining the site!
3.) Leave me a lovely comment below letting me know you've done both #1 and #2

The winner will be announced Sunday, December 16th at 12pm and all items will be shipped just in time for the holidays. Good luck to all!
Photography Credit {from left to right} Picture taken with iPhone, Kelly Dillion Photography, Don't Frett Photography

Dec 4, 2012

DIY: Paper Wreath


Fa-la-la-la-lahhhh! I have started to deck the halls, doors, and beautiful spaces in my home with merry cheer and who doesn't like a good diy project? Here's what will be hanging on my door this year, a beautiful paper wreath!  

To create this beauty I've provided everything you'll need below and a list of simple directions, have fun with this project! 

You will need:
A hot glue gun
2 books filled with your favorite love poems
A wreath (can be purchased at Michael's)
Patience!

Instructions:
1.) Rip out pages and begin to roll them, folding them only at one end
2.) Get ready to hot glue them onto the wreath'
3.) Be patient you won't immediately see the shape come together, but it will!
4.) Hang anywhere in your home and enjoy!


Photography Credit: Summer Street Photography 


Dec 3, 2012

New Inventory Debut

Hey Lovelies!

Happy Monday. Remember when I announced my big news a few weeks ago? Well if you missed it I was fortunate enough to have some of my prettiest vintage pieces rented out to Dolce and Gabbana AND I've expanded my beautiful inventory of plates to include teacups and a few limited accessories.  I am so in love with my plate collection that I wasn't sure if I had the heart or even the time to expand, but after 1 pretty teacup I was hooked and just like magic I've welcomed in even more blush, gold trimmed, floral prettiness. Since the growth of the collection and the explosion of my rental business I often get the head nod of well how did you do it, where do you keep it all, and do you really purchase each piece? 

My journey into the rental business was almost purely by accident, I have always loved to surround myself with pretty details and plates have been something that I've had an eye for even as a child.  I notice them at family gatherings, in china cabinets, at restaurants, and my philosophy is that beautiful china is to be used not locked up in a museum-like china hutch. After trying desperately to find my perfect pattern I decided that the impossible was possible through various pieces. Scouring-hunting-bargaining began and a few plates turned into a few hundred and that quickly turned into (haha) more than a few hundred! I keep each and every pieces that isn't rented right here in my home, tucked very neatly into beautiful built in cabinets just ready to be whisked away and rented.  About 90% of my inventory was purchased by yours truly, and the other 10% was purchased by former clients who liked to shop!

Plates-Teacups-adorable accessories oh my! I am one lucky gal to be in the business of event planning-design-and rentals. Over the next few weeks I'll be sharing with you a few of my favorites teacups, but for now I hope you'll enjoy this peek into my inventory.


Nov 21, 2012

I'm thankful

Oh hello blog world! I am so excited to be back on the blogsphere---yes ladies and gents I have arrived!    Given that today is the day before Thanksgiving I thought it would be nice if I shared with all of you just a few things that I am thankful for this year.

Photo Credit: Don't Frett Photography

1.) Family
This year I lost one of the most important people in my life, my dear Nell (grandmother) I was overcome with grief and through lots of love and support I found my way back.  My grandmother was known for finding a lesson in every story and in her own way she helped remind me of the importance of family, although she is gone her memory and legacy continue to live on in my heart and in the very foundation of my business.

2.) Friendship
The relationships that I've been able to build with clients and vendors is one of the things I value most about my business, I feel like I should be screaming from the roof how amazing all of you have been to me!

3.) Mike and Oliver
Yes, I am thankful for my boyfriend Mike and pup Oliver! They truly are the best start and end to every day and Oliver is the cutest furriest assistant I've ever seen.

4.) Making Me
I can't believe that I'll soon be going into year 3 with my business! There are a lot of changes on the horizon for Making Me that I've been really excited to show all of you (coming soon), I'm working with an outstanding company that is taking my business to the next step and for that fact the next level....I'll be bragging about them in a future post! I keep saying year 3 has a tag line and it's, I have arrived! Stay tuned for more fabulous.

So there you have it, just a few things that I am thankful for this year. Enjoy your Thanksgiving!


Sep 3, 2012

DIY Blue Mason Jars

Happy Labor day!! I couldn't think of a more fitting post than to share with you my favorite something blue...

Mason Jars. Oh how I love thee! In my house mason jars are like laughter, filling every nook and cranny in the most unsuspecting of ways. So after a little research and a recent trip to a craft store I decided to spread the mason jar love by making  a few for an upcoming October wedding. I've dubbed this project: create awesome blue mason jars for a kick ass wedding....


Here's what you'll need to complete this project.....

1.) A few awesome mason jars
2.) A sponge brush
3.) Light Blue Gloss Enamel (you can purchase this at your local Michaels)

Directions

1.) Lightly brush on your blue enamel paint (inside of your mason jar)
2.) Allow your jars to dry outside for 48 hours
3.) Bake your mason jars in a preheated oven of 200 degrees for 30 minutes (this is an absolute step if you plan on washing your mason jars and using them over and over again).
4.) **These are dishwasher safe, so feel free to throw them in there when you're done**


Aug 14, 2012

Proud Business Owner!

I can't believe I'm "double posting" today, oh blog how I've missed you!

It's been two years since I've started my business and looking back at this experience and onward into my future, it's been amazing. Year 1 was all about building my business, year 2 was about refining my style, and going into year 3 has become about building my brand. I've said it once and I'll say it again, this business has changed me. It's allowed me to truly shine in a light that I could have never imagined, I've had the opportunity to work with the most talented clients I've ever met and become their day of coordinator and in the fall I will have had the opportunity to completely design a wedding. I've been featured in wonderful blogs and have certainly proven myself in a competitive industry, but admittedly I still have down days and doubts if this industry will eat me alive.

If you own a business and haven't questioned if you're good enough, talented enough, creative enough, and ready to be that 1 in 5 businesses that still stands after 5 years than you're lucky! I've thought all of these things and more and that's honestly what keeps me going.  When I've been on my feet for 16 hours I still find the strength to write, to shop for more plates to added to my well curated collection, and to reach out to my colleagues in hopes of working together again. It's work, it's a lot of work, it's the hardest work I've ever done, but I know hard work pays off. Today I was brought to tears knowing that the hard work I put in many months ago will be featured in an online digital magazine featuring my design, plates and work. My heart is swollen with gratitude.

All of the beautiful images that you will see came from Shawnea of, Don't FRETT Photography and the two of us can't wait to share the edition with you when it's out!

For now, I'm going to keep a lid on where you'll see our work but please do continue to show your love and support! I'm positive we'll both be filling up your news feed with the most amazing real weddings and inspiration you've ever seen.


Queen DIY Headboard (Creating your headboard) Part 2

Before you begin reading this post, check out the materials you'll need here! Whew ok, so you've hung in there with me, downloaded the Jo Ann's fabric App, and you're now ready to put your headboard together. Awesome!

Right about now I'm wishing I had taken more pictures while I was creating this, but I was super focused.

1.) Before you begin this project you'll want to make sure that you've covered all of your buttons with the coordinating fabric that you'll be using on your headboard. You should have done this using the cover button kit. Don't worry it's self explanatory!

2) Now that you're looking at your pegboard decide where you want your buttons to go. I used a black marker to indicate where my 9  buttons would be. I first counted the number of holes-found the middle-and then the outer edges. Basically you want to make sure your buttons line up on either side of your headboard.

3.) Measure out your foam, cut-adhesive-apply the foam to your peg board.

4.) Cover it with batting stapling all around your peg board

5.) Stand up your peg board (or drape across a saw horse if you have one) and begin wrapping the fabric around your peg board. I had my handy bf help with this part. I ONLY secured a few areas on each side with the staple gun just to hold the fabric in place. Remember you haven't added your buttons so don't pull too tightly on either side!

6.) Thread your loooooooooong upholstery needle with the upholstery thread-loop your button in and place through the foam until you located your marked area on the other side. Be patient this may take a few minutes.

7.) Once you've found it pull VERY tightly and staple! Try going in a zip-zag motion avoiding the other holes

8.) All of your buttons have gone through ,and you're exhausted, hang in there...2 steps away from beautiful!

9.) Secure your top-bottom-and sides, pulling tightly and securing by stapling.

10.) Admire your work...you've made it!

**You can certainly secure this to your wall-bed-or simply lean against the wall. It's very simple. Now for my one and only picture and finished product. I hope you enjoy!

Here's the only before picture I captured.....


And Here's the final product! I can absolutely see myself doing another post juuuuuuuust about bedding so stay tuned.


Queen DIY Headboard (Materials only post) Part 1

Hi blog world! Guess who's back with a special treat to share with you? Meeeeeeeeeeee. If you're here you know that I love me a good diy (do it yourself) project, well last winter I became obsessed with making my very own DIY tufted headboard. I found a bah-gillion tutorials, like this one from Centsational Girl which was a really good jumping off point for me, it helped me to see the shapes and styles I liked and well didn't like. I certainly toyed around with the idea of having a curved headboard  but my boyfriends said it would be too feminine for his likes. Somewhere down the road I also decided that I really wanted the upholstered button--not so tufted but slightly tufted look....I must have read about 20 tutorials until finally deciding to get started.  Fair warning this post is going to be long, so I've decided to split it up into two parts. This post is what you want to read before you begin your project to make sure you have everything.


Fabric: The very first thing I did was pick out a fabric and color that would compliment my room and bedding, my room is painted in a gorgeous color called davenport tan by Benjamin Moore. The fabric I chose is a heavy weight velvet in a deeper gray, I purchased it from Jo Ann's fabric from the final clearance sale section for $4 a yard! I couldn't get to the register fast enough to purchase 5 yards, but please keep in mind that while this was a steal it was also a gamble because it couldn't be taken back.  If you don't already have the Jo'Ann's fabric app, get one and NOW! I signed up while I was in the store with my I-Phone and there were tons of coupons that I could use right off my phone, for this I used a 40% off your purchase.

Fabric Price=$12.00

Batting & Foam: This was by far the most expensive part of the project! Once again using Jo Ann's fabric's I purchased the most inexpensive batting (trust me it's just going to cover you foam) and 4'' thick foam.  I kid you not I almost had a heart attack when I saw how expensive the foam was going to be! I already had foam at home so I only needed another two. Using the Jo Ann's fabric app I used a 50% off regular price item AND a 10% off your full purchase, I was absolutely extra cheap and paid separately for each item.

Batting & Foam=$25.00

Headboard: After reading a bah-gillion tutorials I decided this is where I was going to take a big risk, everywhere I read kept telling me that I needed to get a piece of plywood...my genius moment was when I discovered I would use Peg board instead. I mean why not right? Peg board comes in a variety of size sheets and already has the holes....um GENIUS! Thanks to my local Lowes store I was able to get a large piece for  $14.98 and have them make one cut for free. I obviously needed a shorter length, but I still wanted it to be a bit over sized for my queen bed. If you're going for a standard queen size 62'' width should be fine.

Headboard Material= $14.98

Additional Materials: For this project you're going to want to make sure you have the following: a staple gun, staples, scissors, LONG upholstery needles, upholstery thread, button covers, button cover kit, spray adhesive, patience, and a hand to hold your headboard! Some of the things I had on hand and any others I had to purchase I again used the 50% and 10% off! I saved a lot of money like this and time but having the app right on my phone!

Additional Materials=$15.00

Total Project Cost=66.98 including tax, probably closer to $75.00

Ready to begin assembling your headboard? Head over to the part 2 version!

Jul 23, 2012

Apartment Proud: Kitchen

A few years ago I moved to THE perfect apartment, I have all of the benefits of living and working out of a beautiful space all the while infusing it with tons of southern charm and childhood memories. After watching about a ga-zillion episodes of Nate Berkus and his "apartment proud" segment, I thought to myself...well I'm apartment proud, I should share it!

I couldn't think of any better place to start than in my kitchen! The heart of our home. As you can see I love the green apple color and you'll find hints of it all around the kitchen. A while ago I had a dining room table but later decided that I could better utilize the space with chairs/bar-stools/and a bookcase.


I love my kitchen because of.....


1.) My green chairs, they remind me of the 70's and I think about them being something my mom would have grown up with.


2.) My sink because it's a double sink and it's deep enough to wash all of my vintage plates


3.) My bookcase! Who said you have to use a bookcase for books? I've carefully pulled together all of the things that we use on a daily place and made it apart of our decor. It's filled with wine glasses, gorgeous white plates, large mason jars, pitchers for iced tea, painted silverware, and some other goodies.

When I think about our apartment and all the work we've done to make it feel like home I couldn't be happier with the outcome! I hope you've enjoyed this little glimpse into our kitchen stay tuned for more "apartment proud" posts.


Jun 25, 2012

Monday: DIY Canvas Art work

Monday's are my favorite day of the week, yes you read that right! Monday's are the day when I get to proudly show off my latest DIY project to you and (hopefully) inspire you to begin or complete that DIY project that has been rolling around in your head or home for months.

As you know I've taken on the challenge of completely designing and revamping my bedroom with rehabbed or re-purposed items I've picked up or found around the house. This week I decided to work on adding some unique art work to my walls.

I had 2 old canvas art hangings that I just didn't have the heart to throw away, but I had no idea what to do with them....so they went into the dark hole of my walk in closet for about 2 years...waiting to become beautiful again. This weekend I had a "light bulb" moment, why not paint them and make them EXACTLY what I wanted!

The total cost of this project was: $0
Supplies:
White paint and roller
Painters tape
Gold Spray paint
Patience.....lots and lots of Patience!

Here's the step by step...enjoy!

#1 Identify 2 large pieces you'd like to rehab...below are mine


#2 Paint IT and let it dry! I chose white because I had an idea in my head of the look I was going for. Don't forget to paint the sides.


#3 Get creative, I decided to go with a chevron style strip because I love that pattern and new it would work well in my space.


#4 Spray paint it (OUTSIDE) and let it dry. It's extremely important that you (a.) do this outside and (b.) that you let it dry completely before handling it.

#5 Tear off the tape...


#6 Hang and Enjoy! Overall I'm extremely happy with the way this project came out, I found a way to reuse and enjoy something that otherwise would have been thrown away. I hope you're enjoying all of these fun projects, next week a DIY Tufted Headboard....yup we said it!


Jun 18, 2012

Monday: DIY chair rehab

We've been diy'ing like crazy the past two weeks and if you haven't noticed we've been working on a new room! My boyfriend and I have been slumming it design wise in decorating our bedroom, it will be almost 3 years this summer and we've FINALLY decided to make our home cozy in each and every room. I should first tell you that we live in a historic home so it's charm and character are already inviting, but charm + character + historic can also sound like old. We moved  in with a yellow bedroom and while it was a fine color it certainly wasn't the color for us....we now have a beautiful pottery barn davenport tan on the walls and it's to-die-for. Our goal is to redesign our room on-a-dime,  in my eyes design shouldn't be expensive it should be practical and with a lot of elbow grease affordable. We're starting with a bed and a mirror (I told you we were slumming it!) and everything else that you see we're buying,rehabbing, and making it fabulous as we go along. Last week we previewed our first amazing find for the room , and did a beautiful rehab (if we say say ourselves). Moving forward each week we will be bringing you something new that we've added, rehabbed, and diy'ed our hearts out.

Today his and her's chairs an upholstering journey......

We found these amazing chairs on Saturday and couldn't believe our eyes, 2 chairs for $14! I know what you're thinking are you crazy? These amazing, I think not! But look a little closer, the shape of the chair, arms, and design in the back is practically begging to be returned to something beautiful. I was at first a little disappointed that both chairs weren't identical, but that was until my boyfriend said that they could be his and her chairs for our bedroom, I WAS SOLD!


The first thing I did when I got home was to bring them outside to start looking at them closer and taking them apart so that the rehab journey could begin.  Yup I still loved them, at this point probably even more, next Mike decided that we'd paint them antique white (really like I'd oppose lol).

If you are new to painting furniture please remember to follow these steps:
Sand, Wipe off excess dirt, Prime, Paint, Second Coat.  Trust me if you skip a step you won't love the finished product as much.  

For the upholstering make sure you have the following tools:
Staple Gun
Sharp Scissors
Batting (purchased at Joann)
Foam (1 1/2 or 2 inches should be fine, also purchased at Joann)
Fabric (I purchased 3 yards, but I will use it around the room for other things!)
Spray Adhesive
Patience!


To begin upholstering you want to remove all of the old fabric, I was so excited to rip off this ugly pattern that I could barely contain my excitement, that was until I found another layer of ugly fabric!! Anyways after you have just the wood then you want to start using your own padding that will make for new seating.  With your spray adhesive add your foam to the board, then you'll want to wrap your batting around the seat and staple in the back.  now you're ready for your fabric!! I started with stapling the middle of every side first because you'll want to make sure your edges are perfect.


Now you're ready for your fabric!! I started with stapling the middle of every side first because you'll want to make sure your edges are perfect. The entire process shouldn't take you longer than 30 minutes and it's worth it, the finished product is just stunning!


Tips:

We found beautiful chenille fabric for $4 a yard at Joann fabric in the red tag section...seriously chenille! Don't skimp on fabric!! I was determined to have an expensive look for a fraction of the price and it worked! P.s. If you have a smart phone make sure you get Joann's free app I saved 50% off my full priced item and 10% off my entire purchase..


Jun 15, 2012

HELLO PRETTY


Oh hello Friday, it's nice to see you again! If you're joining us  today you're in for a dose of HELLO PRETTY. A few months ago we were excited to partner with Shawnea of  Don't FRETT Photography to do a fun photoshoot in our studio, and wow did she deliver. We found the sweetest flowers and had lots of yummy treats laying around the house eager to be placed in front of a camera. If you adore the vintage dresser as much as I do you can read all about the DIY tutorial here.

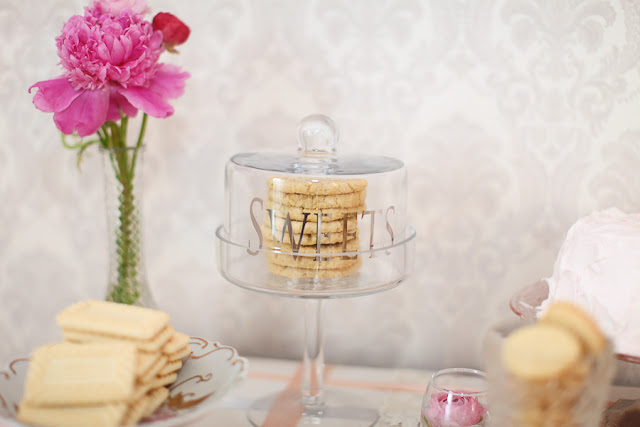
I started out with the prettiest ribbon in my stash (yes I have a ribbon stash...don't judge) and decided to give   the dresser a lattice look. Seriously how much do you love it? From there I added a few of my favs; depression glass, vintage cake holders, vintage glasses, peonies, ranunculus, and a container that said sweets. All of this was a recipe for  HELLO PRETTY.


How sweet is this cake? It was absolutely delicious!


Our studio smelled like lime cookies for days.......


And last but not least when a photoshoot works out juuuuuust as I've planned, I look like THIS! Huge thanks and big hugs to Shawnea at Don't FRETT Photography who supplied all of the beautiful images and great conversation afterward. Here's to the weekend, we'll see you back here on Monday for another fabulous DIY project that we can't wait to show you.


Jun 13, 2012

Wolf pack?

Last week I posted this picture on facebook and I couldn't help but wonder.... am I building a business or a bigger wolf pack (network of close friends...term from The Hangover)?

Photography: Don't FRETT Photography


I work with clients for as little as a few weeks to 15+ months, and during that time we're building a bond, celebrating the success of small and large decisions, laughing, crying, eating, and at the end celebrating their wedding. After their wedding we're still celebrating, laughing, crying, shopping, eating, and talking on the phone while I make my way in to Boston each morning. Ladies and gentlemen it looks like I'm building a bigger wolf pack and having a lot of fun doing it!

Love my clients!


Add caption

Jun 11, 2012

Monday: DIY Dresser #2

Hi Lovelies! Boy do I have a treat for you today...and it's just the perfect thing to get you over the afternoon hump on a Monday. Last week I went hunting for the next addition to my home and found myself in DIY heaven when I spotted this FREE dresser....


Ok, so not exactly the beauty you were expecting, but I saw the beauty in bones of this piece and just knew with a little love it would look fabulous!  So I began sanding, priming, and 3 coats of paint later, I had THIS!  I saved the hardware buy spray painting it gold and then sealing it....and BOY what a difference.

Total cost of this project: $16


Design by Deluxe Designs
all rights reserved. 2011