Jun 25, 2012

Monday: DIY Canvas Art work

Monday's are my favorite day of the week, yes you read that right! Monday's are the day when I get to proudly show off my latest DIY project to you and (hopefully) inspire you to begin or complete that DIY project that has been rolling around in your head or home for months.

As you know I've taken on the challenge of completely designing and revamping my bedroom with rehabbed or re-purposed items I've picked up or found around the house. This week I decided to work on adding some unique art work to my walls.

I had 2 old canvas art hangings that I just didn't have the heart to throw away, but I had no idea what to do with them....so they went into the dark hole of my walk in closet for about 2 years...waiting to become beautiful again. This weekend I had a "light bulb" moment, why not paint them and make them EXACTLY what I wanted!

The total cost of this project was: $0
Supplies:
White paint and roller
Painters tape
Gold Spray paint
Patience.....lots and lots of Patience!

Here's the step by step...enjoy!

#1 Identify 2 large pieces you'd like to rehab...below are mine


#2 Paint IT and let it dry! I chose white because I had an idea in my head of the look I was going for. Don't forget to paint the sides.


#3 Get creative, I decided to go with a chevron style strip because I love that pattern and new it would work well in my space.


#4 Spray paint it (OUTSIDE) and let it dry. It's extremely important that you (a.) do this outside and (b.) that you let it dry completely before handling it.

#5 Tear off the tape...


#6 Hang and Enjoy! Overall I'm extremely happy with the way this project came out, I found a way to reuse and enjoy something that otherwise would have been thrown away. I hope you're enjoying all of these fun projects, next week a DIY Tufted Headboard....yup we said it!


Jun 18, 2012

Monday: DIY chair rehab

We've been diy'ing like crazy the past two weeks and if you haven't noticed we've been working on a new room! My boyfriend and I have been slumming it design wise in decorating our bedroom, it will be almost 3 years this summer and we've FINALLY decided to make our home cozy in each and every room. I should first tell you that we live in a historic home so it's charm and character are already inviting, but charm + character + historic can also sound like old. We moved  in with a yellow bedroom and while it was a fine color it certainly wasn't the color for us....we now have a beautiful pottery barn davenport tan on the walls and it's to-die-for. Our goal is to redesign our room on-a-dime,  in my eyes design shouldn't be expensive it should be practical and with a lot of elbow grease affordable. We're starting with a bed and a mirror (I told you we were slumming it!) and everything else that you see we're buying,rehabbing, and making it fabulous as we go along. Last week we previewed our first amazing find for the room , and did a beautiful rehab (if we say say ourselves). Moving forward each week we will be bringing you something new that we've added, rehabbed, and diy'ed our hearts out.

Today his and her's chairs an upholstering journey......

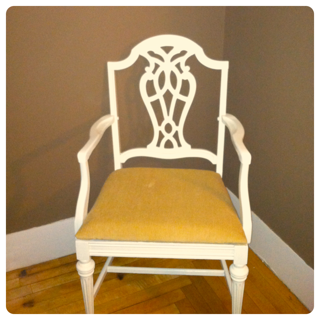
We found these amazing chairs on Saturday and couldn't believe our eyes, 2 chairs for $14! I know what you're thinking are you crazy? These amazing, I think not! But look a little closer, the shape of the chair, arms, and design in the back is practically begging to be returned to something beautiful. I was at first a little disappointed that both chairs weren't identical, but that was until my boyfriend said that they could be his and her chairs for our bedroom, I WAS SOLD!


The first thing I did when I got home was to bring them outside to start looking at them closer and taking them apart so that the rehab journey could begin.  Yup I still loved them, at this point probably even more, next Mike decided that we'd paint them antique white (really like I'd oppose lol).

If you are new to painting furniture please remember to follow these steps:
Sand, Wipe off excess dirt, Prime, Paint, Second Coat.  Trust me if you skip a step you won't love the finished product as much.  

For the upholstering make sure you have the following tools:
Staple Gun
Sharp Scissors
Batting (purchased at Joann)
Foam (1 1/2 or 2 inches should be fine, also purchased at Joann)
Fabric (I purchased 3 yards, but I will use it around the room for other things!)
Spray Adhesive
Patience!


To begin upholstering you want to remove all of the old fabric, I was so excited to rip off this ugly pattern that I could barely contain my excitement, that was until I found another layer of ugly fabric!! Anyways after you have just the wood then you want to start using your own padding that will make for new seating.  With your spray adhesive add your foam to the board, then you'll want to wrap your batting around the seat and staple in the back.  now you're ready for your fabric!! I started with stapling the middle of every side first because you'll want to make sure your edges are perfect.


Now you're ready for your fabric!! I started with stapling the middle of every side first because you'll want to make sure your edges are perfect. The entire process shouldn't take you longer than 30 minutes and it's worth it, the finished product is just stunning!


Tips:

We found beautiful chenille fabric for $4 a yard at Joann fabric in the red tag section...seriously chenille! Don't skimp on fabric!! I was determined to have an expensive look for a fraction of the price and it worked! P.s. If you have a smart phone make sure you get Joann's free app I saved 50% off my full priced item and 10% off my entire purchase..


Jun 15, 2012

HELLO PRETTY


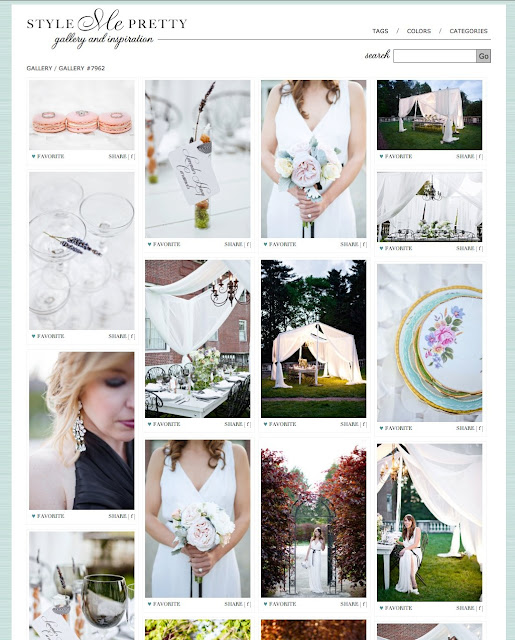
Oh hello Friday, it's nice to see you again! If you're joining us  today you're in for a dose of HELLO PRETTY. A few months ago we were excited to partner with Shawnea of  Don't FRETT Photography to do a fun photoshoot in our studio, and wow did she deliver. We found the sweetest flowers and had lots of yummy treats laying around the house eager to be placed in front of a camera. If you adore the vintage dresser as much as I do you can read all about the DIY tutorial here.

I started out with the prettiest ribbon in my stash (yes I have a ribbon stash...don't judge) and decided to give   the dresser a lattice look. Seriously how much do you love it? From there I added a few of my favs; depression glass, vintage cake holders, vintage glasses, peonies, ranunculus, and a container that said sweets. All of this was a recipe for  HELLO PRETTY.


How sweet is this cake? It was absolutely delicious!


Our studio smelled like lime cookies for days.......


And last but not least when a photoshoot works out juuuuuust as I've planned, I look like THIS! Huge thanks and big hugs to Shawnea at Don't FRETT Photography who supplied all of the beautiful images and great conversation afterward. Here's to the weekend, we'll see you back here on Monday for another fabulous DIY project that we can't wait to show you.


Jun 13, 2012

Wolf pack?

Last week I posted this picture on facebook and I couldn't help but wonder.... am I building a business or a bigger wolf pack (network of close friends...term from The Hangover)?

Photography: Don't FRETT Photography


I work with clients for as little as a few weeks to 15+ months, and during that time we're building a bond, celebrating the success of small and large decisions, laughing, crying, eating, and at the end celebrating their wedding. After their wedding we're still celebrating, laughing, crying, shopping, eating, and talking on the phone while I make my way in to Boston each morning. Ladies and gentlemen it looks like I'm building a bigger wolf pack and having a lot of fun doing it!

Love my clients!


Add caption

Jun 11, 2012

Monday: DIY Dresser #2

Hi Lovelies! Boy do I have a treat for you today...and it's just the perfect thing to get you over the afternoon hump on a Monday. Last week I went hunting for the next addition to my home and found myself in DIY heaven when I spotted this FREE dresser....


Ok, so not exactly the beauty you were expecting, but I saw the beauty in bones of this piece and just knew with a little love it would look fabulous!  So I began sanding, priming, and 3 coats of paint later, I had THIS!  I saved the hardware buy spray painting it gold and then sealing it....and BOY what a difference.

Total cost of this project: $16


May 25, 2012

Plate Love

TGIF! I can't believe this week has zoomed by so quickly, and what a fabulous week it has been indeed. Today's Friday so let's talk all about another element of my business, vintage plates. My obsession for vintage or vintage inspired plate ware is an ever growing collection and each piece is handpicked by you guessed it, me. There is something very special to me about depression glass, pastel colors, 23 carat gold china, Limoge, and Noritake that just reminds me of a time I can only dream about and somewhere between yards of vintage lace, flowing chiffon and silk are my vintage lovelies for the perfect table setting at your affair. I've been asked by more than a few friends and brides exactly how many I have, and my answer is always "more than one girl needs", you're just going to have to take my word on it.

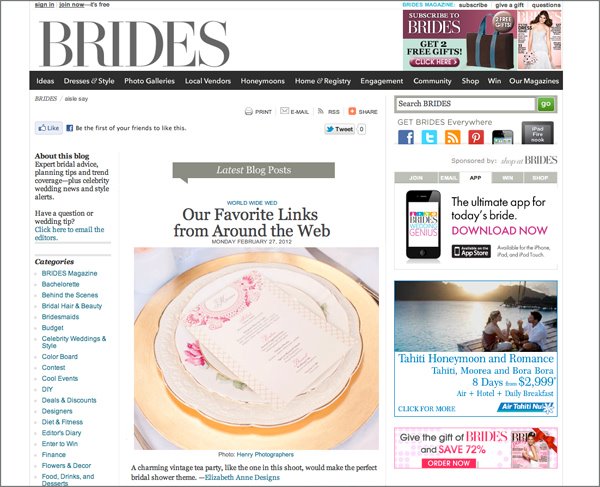
Where can you find these beauties for your wedding? Here of course! But did you know that you could also rent them through New England Country Rentals, where our plates are apart of a full vintage line? YES, you can! It's been such a dream come true to be able to collaborate with New England Country Rentals in order to spread our  love for plates far and wide. No post would be complete without pictures so check out where we were featured this week and another one of our fav's.

Enjoy your Friday lovelies and Happy Memorial Day.

Photo Credit: Kelly Dillon Photography


Photo Credit: Kelly Dillon Photography


Photo Credit: Henry Photographers


May 23, 2012

Gettin' all pretty!

Why hello! This week is flying by, and I have so many wonderful things to share with you that I hardly know where to begin. This is the one time during the week where I feel like I can share with you a bit of what's going on with Making ME and the direction we're going in....soooooooooo (close eyes-squint nose-and type)

We're officially getting a whole new look! Gah, it's taken me months to share this news with you but I truly couldn't be happier. It's a business owner's dream to step into the big world of entrepreneurship knowing that they have the kind of brand that people will remember. The entire process has been so amazing and dreamy, I can't even begin to tell you how much I adore the dynamic duo that's making it all happen, Makewell.

I ABSOLUTELY can't wait to show you the new "Making ME"!! Stay tuned and keep your eyes peeled for some amazingness.....and because no blog post is complete without a cute pic, check out this sneak peak at our studio!


May 21, 2012

DIY: Dream Dresser

Happy Monday. I absolutely couldn't wait to sit at my computer and write today's blog post! Monday's are all about perfecting the art of D.I.Y'ing (aka do it yourself) and showing it off, for now I'll only be featuring the projects that I D.I.Y but as my house and studio are completed I'm sure I'll have more to show you.

Last summer I was determined to find a dresser that could be used as a multi-functioning piece, I searched and scoured websites like freecycle and craigslist until finally giving up. Then one day while browsing craigslist I found it,the dresser I had searched months for. The dresser was a little banged up, but the lines and details were perfect and for $5 hell I could ignore any scrapes and scratches. I put the dresser in my living room and used it for my 1 year business party and I was starting to see it's potential.

 Below is the dresser! Not to shabby for a $5 find right? After seeing pictures I knew that I had made the right choice but the color was just all wrong for me, I'm from the south and LOVE white furniture! It's cliche but if this dresser was going to stay in my home I had to make it me.

Photo Credit: Summer Street Photography 


So the transformation project began to turn boring into BAM......

Step #1 

Sand the dresser so that it can be ready for primer and paint. I'd recommend doing this outside. You'll thank me later!

Materials to Sand: Free! My landlord is awesome!


Step #2

Pic out a Primer and a Paint (I had a water damage stain that if I hadn't primed the dresser the ugly mark would have been noticeable). I also should tell you that I initially used a flat paint, but after realizing it could get a bit dirty I repainted with a gloss antique white. It still looks gorgeous!

Paint: Lowes $20 for Paint, Primer, and a new brush!


Step #3 

Accessorize-Accessorize-Accessorize! I wanted mismatched hardware and decided right then and there to come up with a color palette for the entire studio space. Deciding not to fight with the existing vintage wallpaper but include it into the color palette was the right choice and it gave me the exact pop of silver I was looking for. 

Hardware: Anthropologie $12 for 4 new nobs on super sale!


Step #4

Enjoy it!

Finding the perfect dresser took a while, finding the perfect paint and accessories took only a few days but it was all worth it. This is my dream dresser and I made it for under $40. It's now nicely tucked away in my studio and has been used as a mini-bar, dessert station, brunch area, and more! I like to think this studio is a place where all things pretty go and I'm happy to say that this was one of the first pieces. 

Photo Credit: Don't Frett Photography


May 19, 2012

Blog Brain working!

Today is THE DAY that I get back on the blogging horse and with a 3 month hiatus I'm finally feeling like my writers block is over! Seriously blogging is a lot harder than I EVER thought it would be, some days I would sit at my computer just thinking about topics to write about and it was torture. So to get myself in a better blog space I'll be blogging 4 times a week on specific topics (hello organization.bye-bye scatter brain!). As many of may know my business has really grown up over the past year, we went from just being wedding planners to include vintage plate rentals (absolute obsession) and that entails a lot more than just wedding talk.  This has also been the year that we've opened our own studio and have been crafting our way to perfection! So FINALLY we have a lot to say! I hope you'll stay with me on this fun journey to becoming a better blogger and drop me a line, comment, or just leave some love when you can.


So DRUM ROLL please for our weekly line up.


Monday: D.I.Y crafting our way to perfect projects


Wednesday: Weddings & The business of planning


Friday: Make My Plate


Weekends: Fav pics from around the web


Feb 16, 2012

Are you ready to rent?

Many years ago when I started collecting vintage plates I had no idea that what I'm dubbing as the "plate phenomenon" would take off and boy am I happy it did. Now knee deep in plates I'm happy couples get to add an extra special touch to their wedding by using my vintage plates.

Deciding whether or not you should rent? Well let's dish, no literally let's talk about why you should be thinking about renting.

1.) It takes a lot of time, let me repeat A LOT of time to collect these one of a kind pieces. It's taken me years to build a collection that I'm proud to put together for clients.

2.) What on earth are you going to do with the hundreds of dishes after your wedding? When you rent with me, NADA I'll pick them up and you can enjoy the lovely comments from all of your guests for years to come.

3.) They're gorgeous...pinky-promise-swear

4.) Ok really, do you really need anymore reasons?

Below is a preview of our awesome vintage collection....Love-Like-Share-Pin these babies to your hearts content....

Photo Credit: Henry Photographers

Photo Credit: Henry Photographers


Jan 5, 2012

Vendor Love

Vendors this post is just for you! Over the past year and a half (yikes and wow) you've been so instrumental in the success of this business.  Many of you have referred clients my way, worked on special projects such as editorial photoshoots, clicked "Like" on facebook, and have left your words of kindness and encouragement.....all of those things mean so much to me and now I'd like to pay it forward to you.  Please leave me a comment describing a tid-bit about your business and if you'd like to collaborate in the future...if you can dream it we can build it!


Picture used from Blitz and Glam


While you're here once again I'd like your support in increasing the readership of this blog...so please kindly become a follower--------------------------------------------------------> Look right over HERE--->


Many thanks and much love!

Jan 4, 2012

Day 10: What mama didn't tell me

So we are yet again doing a bit of combined post love....and yes still counting down with only 19 days to go.

This next post came from a conversation with my mom, Celeste. Over the years we've shared hundreds of conversations, each one giving me gentle direction about love, life, career, and all that happens in between, but there are some things that "mama didn't tell me".  When I started this business, a  young bright eyed bushy tailed, naive in many ways girl began the journey. Along the way and far from the end a strong, thoughtful, optimistic but realistic woman emerged. Mama didn't tell me that in order for this business to be successful I'd have to sacrifice so much for it's success but here I am telling you what life is really like when you own your own business.  I've cried, jumped for joy, and sought guidance when needed, I've learned that no decision can be made before I mull it over with a cup of coffee, and I've learned that this business sinks or swims with yours truly.

Just so we are clear....I plan to swim my ass all the way to the top keeping an open mind, warm heart, and strength of the family that gently whispers to me when it's time to make the next move.  Mama didn't tell me that the journey to the top would be long, arduous, painful, and at times discouraging but I'm telling you it is.  If you plan to go into business be prepared to fail.....write yourself a little note that reminds you, you knew this would happen, gather yourself and move onto what's next.

My note is simple and it says this......

Nancy, Minnie, & Ruth.

The meaning is for me to know, but the purpose is to remind myself that with great success comes great failure. Now maybe my mama didn't tell me this, but this may have been the best lesson that I learned early on in my business. Plan to fail and Prepare to succeed.

See you on day 18!


Jan 2, 2012

Day 10: No resolutions for me!

21 days left until the big day and only the second day into the new year.  This year I admittedly and purposely didn't make a New Year's resolution list, why you ask because I can't think of a thing I'd like to change that I haven't already put in motion in 2011.

On the business side I made a promise to myself last year that I would embrace who Making ME is, a small firm looking to take on only 15 events a year with a focus in clients. Ah yes and of course it was finally time not just for my former clients to know me but for the wedding industry to know me as well, you see the thing about owning a business is you can't work in your little bubble. This is an industry that craves to know who you are!

Who am I....I'm 5'2, lover of black clothing, gap between my two front teeth, with a FIERCE AFRO. Yup in a nut shell that's me.  In a year I've risked it all and by God I've come out stronger than ever, it's as if I've emerged over the last year, finally becoming the woman that I've been dreaming about, finally becoming ME.

A little less than a year ago and only a few months into my business I decided it was time to make a change. I looked in the mirror and with a pair of scissors in hand I closed my eyes and said goodbye to my relaxed hair. A HUGE chunk of hair was gone and there was no coming back, I called my friend Sara and she finished the rest....what was left was....well nothing.

My hair also known as a woman's strength was gone, but strength was in the little hair on my head that was left. That hair represented the new me, the me that would come to accept herself as the square peg never quite fitting in the round hole, and the crazy love obsessed planner who would soon have a love affair with plates!  With my dream only steps in front of me I did it and the world is seeing me! My strength, my confidence, and my continued passion grows daily~as does my hair.


BEFORE


AFTER


TODAY!
photo credit: Summer Street Photography

Jan 1, 2012

Day 9: Happy New Year!

Happy New Year! 2012 is going to be an exciting year for me and my baby Making ME. Let's recap last year shall we....we planned 15 events to include weddings, birthdays, celebrations and just because events, styled 5 shoots while working in collaboration with photographers, ate at least 100 pieces of cake (a personal victory), and watched a lot of "I do's". 2011 was a successful year indeed and we closed it with an amazing event we planned, The Lexington Symphony Gala. Throughout the day I took moments to reflect on how far we've come and just where we're going, at every turn I saw the same thing, our future is incredibly bright! This year we plan to embrace who are: a small wedding boutique firm focusing only on 15 events per year and renting out our beautiful collections of plates....every chance we get.

With 22 days until I turn 30 I reflect again on how much this business has helped to transform me too. Our name Making ME Event Planning Firm is so fitting, it's what we do and it's who we are. Behind every blog post you'll know it's me; Phebe and at you're wedding you'll know that I've poured hours upon hours into making sure your wedding is YOU.  I'm starting to think that 30 is like a new pair of jeans...it fits me and finally I'm starting to feel like I'm ready to try it on.


{Picture taken from Ecopreneurist}

Dec 30, 2011

Day 8: Becoming one of them

Combined post: 4, 5, 6, 7, and 8!

The countdown continues with 24 days to go until I'm 30 and I must say the past 5 days have been such a roller coaster of excitement. To catch you up my sister aka partner in crime is ENGAGED to the man of her dreams, the plus for me is that I get to gain a new brother (I hope he knows that I'm apart of the deal too hehe), Making ME is growing and making such a proud mama out of me, and me well I'm planning to take 30 by storm!

I feel like so much of my life has been about making discoveries...subtle and on a grand scale. When I was a teenager I discovered my love for music, in my twenties I found my passion for planning, and in my late twenties most days I feel like I'm having a love affair with all things resembling design. I can see a pattern, ribbon, color and literally fall in love with it and decide exactly the kind of event I want to use it for. I remember starting this business in my head years before I ever saw it on paper, I yearned for a business that could allow me to discover my inner strengths and passions while transforming women into wives. I could watch them take their first steps into this remarkable journey, but what I hadn't thought about until my last wedding in November is that they were watching me too and I WAS MAKING ME. I was becoming this woman who was a combination of all the women I had admired, they were strong, confident, creative, passionate, idea flowing, and take the world by storm women...I was becoming one of them.

 
Design by Deluxe Designs
all rights reserved. 2011